Showing posts with label hair accessory. Show all posts

Sunday, July 3, 2011

Weekend Prettiness


I hope everyone is having 
a great 
July 4th weekend.

 I decided to take a 
holiday from studying
and play
I learned how to 
make a new 
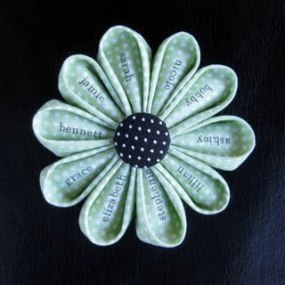
kanzashi petal. 
These ones are so easy!
I made two sets!

What has everyone else been up to?

Sunday, June 5, 2011

Look What I Can Do!

Remember that 
I posted on Monday?

Well look what I can do!

Day 1:
This was my first attempt.
Above: Pointed petal Kanzashi
Below: Round petal Kanzashi

I used 2" squares of some scrap cotton that was hanging around my  craft box, I think it was supposed to be a skirt at one time. I gave the fabric a good couple of applications of spray starch and ironed it well. The thin material with the starch acted alot more like paper and folded well.
Turned out to be pretty easy!

Day 2:
This was my second attempt.
Both are round petal Kanzashi.

I played around with the number of petals to see how it affected the look of the flower. 

I made these from squares of 1 1/2" satin ribbon. I sprayed these well with starch as well and ironed them quite thoroughly. 
These were more challenging as the slippery satin did not want to fold as cleanly as the cotton had. 
Also the white ribbon didn't absorb the starch as well as the red ribbon did so it kept unfolding itself and fraying.

Lesson learned:
The more starch you can apply BEFORE attempting to fold,
the better and easier it is for you.

I turned the cotton one's into little hair clips
This one is 2" across
A nice statement piece that isn't
too flashy.

I put this one up on 


 The red and white one's 
have not been assigned a purpose yet but I think I will make one more red flower and put all three on a comb.

What do you think?
Do you have any tips on making Kanzashi flowers?
Please share if you do!

I have another Giveaway lined up for this week,
you lucky readers, 
so keep you eyes peeled.


Monday, May 30, 2011

How to Monday: Tsumami Kanzashi

I hope everyone has enjoyed the Memorial Day Weekend, I know I have. While I was scanning the internet for some inspiration I came across a new trend that I struck very close to home.
Kanzashi flowers.

These are flowers made from little squares of folded material that are then sewn together. Very popular right now amongst crafters.

Did you know 
 it is a traditional Japanese art that is in danger or disappearing because of the lack of trained artists? 
There are only 5 artists that are acknowledged to be trained in the traditional art form still alive and practicing.

is a studio run by a Kuniko Kanawa that still produces authentic pieces of Tsunami Kanzashi. Kuniko herself was trained by one of the few Kanzashi artists and strives to preserve this piece of disappearing Japanese culture.

Here are a few images from her 

Karyu (Cherry Blossom and Drooping Willow) 

Tsumami Kanzashi Bobby Pin


Vintage Kimono Momiji 

 (Japanese Maple) Tsumami Kanzashi 

Hair Clip with Black Onyx


 set of Shou-Chiku-Bai 

(Pine-Bamboo-Plum Blossom) 

Tsumami Kanzashi for Maiko 

 Kanzashi of January


I remember being a child and pulling very similar hairpieces out of the big cedar trunk where the kimonos were kept in the basement in anticipation of Spring Festival at the JCCC

Please visit the Atelier Kanawa website, you will find a wealth of information about the history and culture of the Kanzashi flowers. Just by learning a little about what they are you are preventing a beautiful art from disappearing.

Want to learn how to make these beautiful flowers?
Here is a tutorial can be downloaded by Christina Stoppa
a big thank you to her for making this great tutorial free to the public.

Please check out her Etsy store


Tuesday, May 17, 2011

Everything's Coming Up Roses

  Typing hurts, 
I have a number of pin pricks on the pads of my fingers and am covered in Krazy Glue, but it's been a great day. I was asked by a co-worker to make some rose combs for a party she is having so I have been at it all weekend.


I know it may not look like a ton of work but let me put it this way....
Five combs = 10 roses + 10 leaves 
crocheted by hand.
Plus 
having to glue them into place 
AND 
sew the roses securely to the comb. 

Yes I go through all that work, 
Grandma would kill me if I did it cheaply.
  
  But they look great, the red one was hiding so it didn't make it into the picture. I am thrilled at how much positive feedback my little combs are getting from you dear readers and from others around me. Thank you so much, I am much like Tinkerbell and need applause to survive.

  I bought a couple new items to finish off this project since I exhausted most of my supplies on my Etsy store. A quick jaunt off to the Hobby Lobby and I came back with new Krazy Glue Gel and invisible thread.

 Lets start with the glue.
image property of Krazy Glue
  I picked up the "Craft" formula because it promises to not glue your skin together, at least not instantly, and I thought the gel wouldn't run everywhere like the original stuff which basically has the consistency of thickened water. 

  The gel consistency is good, a thin gel that goes on in little dots, very easy to control on small surface areas like my combs. I did get some on my fingers and it wiped off easily if you got it within 30 seconds otherwise you were stuck with the glue.

  Upside is this formula does not turn into a second skin and is fairly easy to peel off without taking a layer of your skin with it. 

  Downside is that the "bonding" time is long, the package says 30 seconds. It took longer before my roses even stuck to the comb,let alone were bonded and secure. Also, do not over apply this stuff! It's not joking when it says use only 3-4 dots per square inch. If you do go overboard expect the bonding time to take even longer. 

  Overall the Craft Gel Krazy Glue is a decent product for the casual crafter, but don't use it on anything you really want a strong bond. I think next time I'll pick up the original formula and wear surgical gloves, I think I still have a pair of Biogel's that I got from the OR hanging around.

On to the thread.
image property of Coates & Clark
  I finally found the "invisible thread" I was looking for at the Hobby Lobby, after looking for it at two other stores. I should have known just to go there first. 

  For any of you who are unfamiliar with invisible thread, it is a fine thread made of a transparent nylon. Basically the idea is that you don't see the stitches when used, this thread is commonly used on the hem of pants for a nice clean look. Don't believe me? Go check your dress pants, I bet one set has an invisible hem.

 I wanted to use it so when I stitch the roses to the comb it has a cleaner look, with the invisible thread you can't notice that I have wrapped stitches around the comb to hold the roses in place least the glue not do it's job.

  I favor Coates & Clark mainly because next to Singer it is the only thread I remember my Grandma using, and it has never disappointed me. This particular thread is very fine and REALLY hard to see, even doubled up on the comb you really have to look to find the stitches.

  Upside, you don't even know I stitched the roses to the comb. It makes for a very clean and professional look. 

  Downside, this thread is REALLY hard to see. It makes it hard to keep track of where your thread is and often gets wrapped around something. It is also very fine and thus is prone to tangling and snapping if you pull too hard. 

  I am pretty experienced in sewing with a needle and thread and I found it a bit of a challenge. My advice with this stuff is make sure you take your project into really good light and go slow, you will avoid getting all snarled up this way. But a great thread if you don't want anyone to know it's there.

Hope this has been helpful!

*The opinions stated above are mine and have not been solicited by any of the companies mentioned. I have not been compensated in any way for these opinions.*


Monday, May 9, 2011

Pearls and Roses

While I am not a mother (no, there is no "yet" in that statement either) I seemed to be inspired by Mothers Day this weekend. I found these pretty fresh water pearls in a soft pink and could't resist playing with them.
I love the irregular shapes 
Pearls to me always says "Mom" to me. Both my grandmothers and my Mom had a classic string of white pearls they would pull out for special occasions like weddings. 

I have my own "special occasion" pearls now, 
thanks to my little bro who picked out this gorgeous strand for me in Japan. 

My "special occasion" pearls
 But,
 I wanted some pearls that were less dressed up and formal, but still feminine and pretty. Something I could wear with a summer dress or to dress up my jeans, cardi and cami uniform. 
This is what I came up with.

Shabby Chic Pearls

I think the irregular shape of these pearls give them a more relaxed feeling. The pink makes it fun and girlie, and they are pearls, you can't help but feel like a lady in them!

Oh yes!
I finally found that spool of red thread I knew I had bought hiding in a corner of my closet, so I made another rose comb.
Red Rose Comb

I can't seem to keep these listed on Etsy, as soon as one goes up it sells. Guess I shouldn't complain

I hope everyone had a nice Mother's Day weekend!


Thursday, April 28, 2011

My Etsy Grand Opening Giveaway!!

Big news dear readers! It's official, the Neko Knits Etsy store is now open. I was up late last night playing with pictures and posting items. As you can see on the sidebar the culmination of several months work is now being displayed!


You know what that means... 
it's time for a 
GIVEAWAY!! 

This is whats up for grabs:


The winners choice of one of the above items:
Rose Comb 
(winner's choice of color)
Sea Glass Choker
Boho Chic Necklace

I know you all want the details on how to enter, so here they are.

  1. Follow this blog (I want to see that list of followers grow!)
  2. Follow the vivacious Katri at Cardigans and Cookie Dough
  3. Follow the lovley Mrs.E at The Electric Elmo Newsfeed
  4. Visit NekoKnits on Etsy and "Like" one of my items
  5. "Share" this Giveaway on Facebook with all your friends 
That's 5 entries,  for this giveaway! 
When you have done any of the necessary actions for an entry, use the form at the bottom of the post to send it in to me. 
I'll announce the winner on May 14th.
Good Luck!! 


Many thanks to Katri and Lacy for helping spread the word about this giveaway. You guys are amazing bloggers!


Tuesday, February 15, 2011

Spring has sprung....

 "Spring has sprung,
 The grass has riz,
I wonder where them birdies is."
-Annonymous

  Spring has sprung in the desert (sorry to all you folks on in the heartland and east coast!) I can tell because the grass has definately "riz" and my little garden is looking like it is recovering from that freak frost we had a couple weeks ago.  Yes we actually had three days of freezing temps and got ice on the fountains, ICE! I digress and will share the pictures of the ice another time. Right now the sublime 78 degrees and bright wild flowers blooming is enough to have me singing "Here Comes the Sun". 

 Now my garden is saddly still a little bare and no blossom's in sight.  So, not to be out done by those brazen little wild flowers I decided it was time to make my own flowers.  I have a ton brightly coloured crochet cotton and my husband is ready to declare war on my yarn stash, so I figured this was a great way to use the scraps of cotton left over from previous projects. And this is what I ended up with....


My very own rose garden!

  The large roses were made using size 3 with crochet cotton with a 2.75 mm steel hook, the small yellows and purple were made using size 10 crochet cotton and the blue and pink were made with nylon Cro-Sheen that was sent to me from a friend who gave up on knitting (thanks Lacy!). All the small ones were made with a 2.25 mm steel hook.


  There are a number of free patterns for roses and other flowers out there, check through my links for free pattern sites.  I tend to use this pattern from Crochet Spot as it is the best one I have met yet and as a bonus they even have a great step by step tutorial for how to roll up your roses, believe me it is not as easy as you think! 


  Ok so now that I have a veritable rose garden the next question is what the heck am I going to do with them? I have a tolerant hubby but he is not going to want them hanging around so I needed to find something to do with these little guys. Well while cruising a friends fashion blog I noticed that flowers are HOT this year.  Take a look!


  So I figured I could follow the trend and make some cute flower hair ties! 


I started with a flower and decided that it needed a little something something, so I went through my boxes and some ribbon in a number of shades of green. I like the bright green one on the yellow rose.

I made "leaves" by creating a double twist. 
It looks something like this.
                            Then attach it to the base of the rose.


And you get this!

Super Cut Rose


Attach your super cute creation to an elastic hair tie with a few stitches of black thread....


Voila! You have a trendy and cute hair tie!
 
Make one or two...dozen!
Now even if you are snowed in you can have your own spring flowers and wait for them birdies to arrive!